

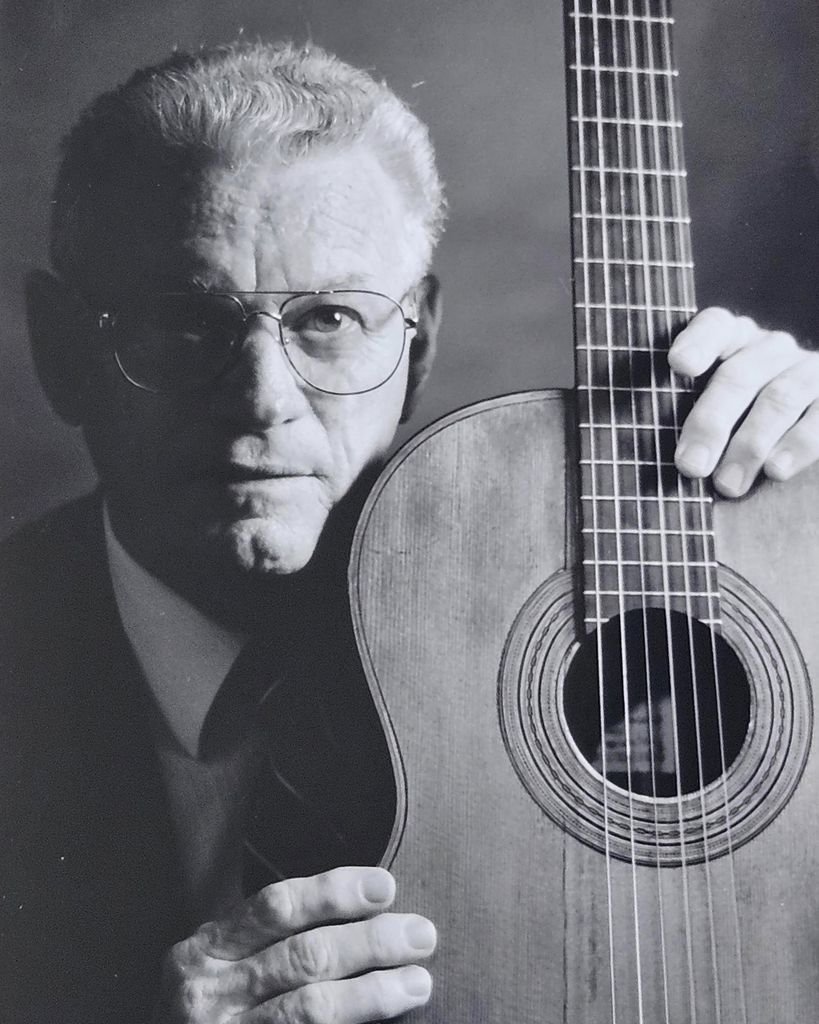
Remembering Elias Barreiro: A Personal Tribute
Remembering Maestro Elias Barreiro
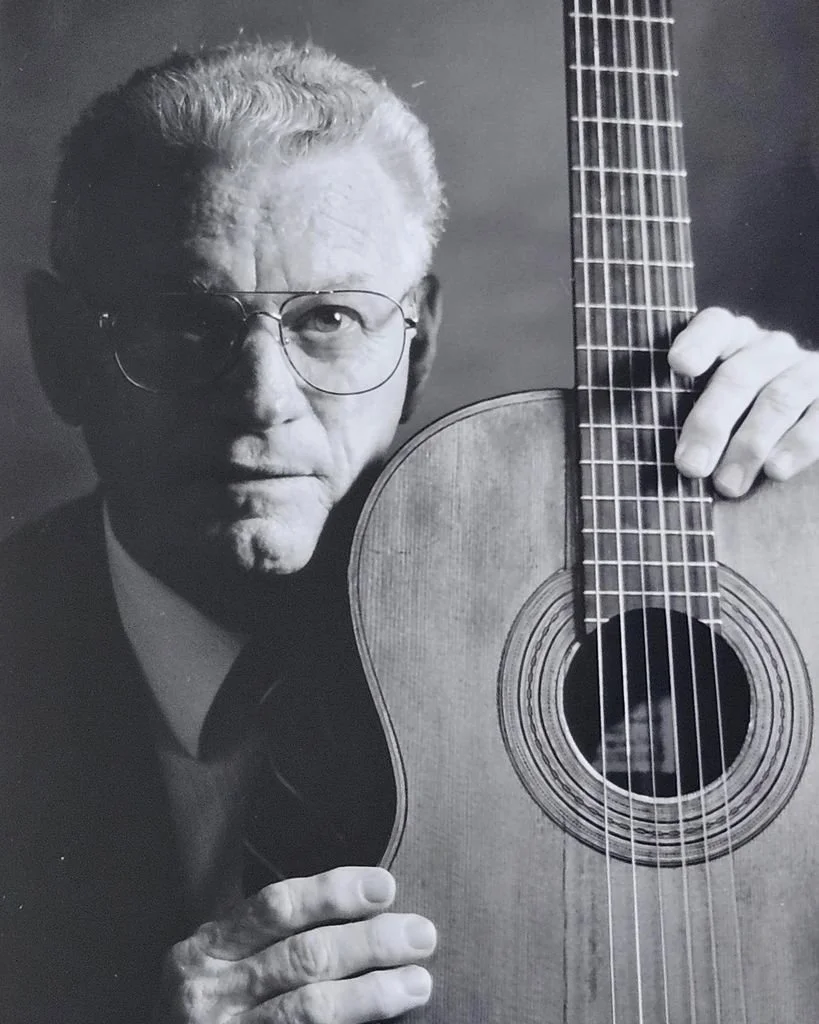
Between 1985 and 1990, I walked into Ace Music Center on Carrollton Avenue as a shy young guitarist still shaping my musical identity. I had begun my journey largely through self‑directed exploration — learning by ear, experimenting, and developing instincts the way many passionate players do. Before meeting Elias, I had the privilege of studying with Maestro Joseph Ishkanian, whose early guidance helped me take my first steps into the world of classical guitar.
But even with that foundation, I knew I needed a teacher who could help me refine my technique, deepen my musicianship, and guide me toward a more intentional path.
I found that teacher in Professor Elias Barreiro.
A Teacher Who Understood the Self‑Directed Path
One of the reasons Elias’s teaching resonated so deeply with me was that he understood the blend of self‑taught instinct and early formal training I carried with me. He had lived a version of that journey himself. As a boy in Camagüey, Cuba, he first encountered the guitar through popular music and a 78 rpm record of Segovia. His earliest learning was self‑driven, fueled by curiosity and passion, long before he entered the conservatory.
That shared beginning created an immediate connection. Elias never dismissed the parts of my playing shaped outside traditional study. Instead, he honored them. He allowed me to make mistakes as long as I played with passion and not sounding too mechanical. He recognized the creativity and resilience that come from learning through exploration, while gently guiding me toward structure, clarity, and refined technique.
A Life Marked by Sacrifice, Resilience, and Grace
Elias’s rise to becoming a foundational figure in American classical guitar was anything but easy. His story — beautifully documented in The Guitar’s lifetime achievement tribute (https://the-guitar.com/elias-barreiro/amp/), is one of profound sacrifice and unwavering determination.
In 1966, he left Cuba with his wife and children under the Freedom Flights program. They were forced to abandon everything: their belongings, their home, even his treasured Torres guitar once owned by Tárrega. They arrived in the United States with only the clothes they were wearing.
And yet, within two months, he was teaching at Tulane University.
From there, his career blossomed:
• 45 years teaching at Tulane
• Founder of the Classical Guitar Society of New Orleans
• Owner of Ace Music Center, where I studied with him
• Student of Andrés Segovia in Santiago de Compostela
• Recording artist, arranger, and respected pedagogue
• Mentor to generations of guitarists who now shape the field
His life was a testament to what perseverance and love for the guitar can create.
Lessons That Changed My Life
My weekly lessons with Elias at Ace Music Center were transformative. He had a rare gift: the ability to correct you without diminishing you. His teaching was gentle but uncompromising. He could take a player with a mix of instinct, early training, and self‑directed habits and show them how to shape a phrase, refine tone, and understand the deeper musical story behind every piece.
He gave me structure without taking away my identity.
He gave me technique without extinguishing my curiosity.
He gave me clarity without limiting my creativity.
Those years formed the foundation of everything I would later become as a guitarist, educator, and creator of digital learning tools.
His Influence Lives in My Teaching
On DrJClassicalGuitar.com, I often write about the journey of self‑directed players — the challenges, the breakthroughs, the joy of discovering music on your own terms. Much of that perspective comes directly from Elias.
When I teach my own students particularly guiding adult beginners, or help self-taught players blend instinct with technique, I hear echoes of his voice:
his patience
his clarity
his respect for the student’s journey
his belief that music is both struggle and victory
Elias taught me that great teaching is not about imposing a method — it’s about nurturing a musician.
A Legacy That Continues to Grow
The tribute article mentioned above highlights how his masterclasses and concerts at Tulane connected generations of guitarists — Manuel Barrueco, Sharon Isbin, Berta Rojas, Michael Newman, and many others — forming a lineage of musicians shaped by his presence .
He was a bridge between Cuba and the United States, between tradition and innovation, between self‑directed beginnings and refined artistry.
A Personal Farewell
As I reflect on his passing, I feel immense gratitude:
For his patience.
For his guidance.
For the way he saw potential in me before I could see it in myself.
For the way he transformed my musical life during those years at Ace Music Center.
For inviting me in his home.
Elias Barreiro rose from humble beginnings to become a transformative figure in classical guitar. I am honored to have been one of the many students who benefited from his wisdom, generosity, and spirit.
May his memory continue to inspire all who pick up the guitar in search of something deeper.
Learn more about my Journey with Classical Guitar at www.drjclassicalguitar.com
Learning Guitar on Your Own vs. Learning with a Guide: What Actually Helps Guitarist Grow and Break Through Stagnation?
In a world full of tutorials, tabs, and quick tips, it’s completely natural to wonder whether you really need a teacher to learn guitar. Many players start on their own, and that curiosity is something to celebrate. Picture yourself trying to play your first chords—maybe struggling to get your fingers in the right place, or feeling a bit lost after watching a dozen YouTube videos. If that sounds familiar, you’re definitely not alone.
But at some point, most self-taught guitarists hit a wall and their playing stagnates. They may ask themselves a deeper question:
“What will help me grow in a way that feels steady, musical, and meaningful?”
That’s where the difference between self teaching and guided learning becomes clearer. In this article, we'll explore how each approach shapes your progress and musical enjoyment, helping you decide which path might suit your musical goals best.
Information is everywhere — but how effective is it?
If you’ve ever tried to learn guitar on your own, you know how easy it is to get lost in a maze of videos, tutorials, and advice that sometimes seem to contradict each other. Maybe you’ve jumped from one lesson to the next, picking up bits and pieces but never quite finding a clear path forward. It can feel like you’re assembling a puzzle with half the pieces missing—or with no picture to guide you.
Structured guidance gives you direction and helps you progress with purpose.
“When you have someone helping you connect the dots, you’re less likely to feel overwhelmed and more likely to build real confidence in your playing.”
Technique shapes your future playing
Many self-taught players eventually hit roadblocks—tight shoulders, stiff wrists, awkward finger placement, or a choppy sense of rhythm. These habits can sneak in unnoticed when you’re practicing alone, and over time, they can make playing feel frustratingly unnatural. This is where a great teacher makes all the difference.
A teacher acts like a musical mirror—spotting the subtle sources of tension and guiding you toward solutions. For instance, they might notice your shoulders creeping up and gently remind you to relax them, or they’ll adjust your wrist angle so your fingers fall naturally on the strings. If your hand position is causing strain, a teacher can demonstrate a more relaxed placement, helping you avoid discomfort and play with greater freedom. They’ll introduce targeted exercises—like slow, deliberate chord changes or rhythmic clapping drills—that build muscle memory and loosen tight movements. Over time, these small corrections add up, making your technique feel less forced and more expressive.
Good technique is more than mechanics—it’s what lets rhythm and harmony move through you, and ultimately, flow from you. When you play with ease, your musical voice becomes clearer.
With the right guidance, you build habits that make playing the guitar a source of joy, not struggle. You discover that the most expressive music comes from a place of comfort and confidence—where your hands, your heart, and your sound are all working together.
A guide helps you grow musically, not just mechanically
Self teaching often focuses on “what to play.” Guided learning helps you understand:
how to shape a phrase
how to create tone
how to listen
how to express something personal
“The difference between self study and guided study is knowing how to play notes and understanding how to make music.”
Support matters when motivation dips
Every guitarist, beginner or advanced, hits moments of doubt or frustration. When you’re on your own, those moments can feel like dead ends.
With a guide, they become part of the journey. Someone is there to help you adjust, breathe, and keep going.
Multiple Paths to Growth
Some players thrive with a teacher from day one. Others start alone and seek guidance later. Some move between both. Most serious students of the classical guitar continue to acquire new skills and improve on their technique well beyond formal training.
There’s no wrong path — only the path that helps you grow with joy and confidence and accomplish your initial goal of why you wanted to learn classical guitar in the first place.
Why is Personalized Guidance Crucial
If you’re exploring guitar and want support that feels clear, encouraging, and tailored to you, a teacher with the right guidance can make the journey smoother and more meaningful.
It’s not about feeling like you “should” have a teacher. Instead, it’s about recognizing that you deserve a learning experience designed to help you progress and truly transform your playing.
With my current introductory offer of a free 30-minute introductory lesson, I can share with you what you might be missing- Book your appointment today by filling out a brief application at this link:
Free 30-Minute Lesson Offer
Ready to grow your playing? Your next breakthrough starts at drjclassicalguitar.com
Playing Without Nails (Rediscovering Warmth, Simplicity, and Touch on Classical Guitar)
Why Play Without Nails?
Playing without nails is not a compromise—it’s a tradition. For centuries, guitarists and lutenists played with the flesh of the fingertips, producing a warm, intimate, vocal tone that modern players sometimes forget is even possible. Whether you’re dealing with a broken nail, exploring historical performance practice, or simply curious about a different sound world, playing without nails can be deeply rewarding.
It’s not about losing something. It’s about discovering a different kind of connection to the instrument.
The Sound: Warm, Round, and Human
When you play without nails, the string is set into motion by the soft pad of the fingertip. This creates:
a warm, mellow tone
a round, flute‑like attack
less brightness and edge
a more vocal, expressive quality
The sound is less “projecting” but often more “inviting.” It draws the listener in rather than pushing outward.
Technique Adjustments: Small but Important
Playing without nails requires subtle shifts in right‑hand technique. Nothing drastic—just refinements that help the string speak clearly.
1. Hand Angle
A slightly more vertical finger angle helps the flesh release the string cleanly.
2. Finger Pressure
Use a firmer fingertip to avoid a mushy attack. The goal is clarity without tension.
3. Follow‑Through
Even without nails, think of playing through the string, not plucking at it. This creates a fuller sound.
4. Contact Point
Experiment with playing slightly closer to the bridge to regain some brightness and definition.
These adjustments help you maintain control and clarity while embracing the natural warmth of nail‑less playing.
Rest Stroke and Free Stroke Without Nails
Both strokes are absolutely possible without nails—just different in feel.
Rest Stroke
produces a surprisingly strong, warm tone
helps compensate for the lack of nail‑driven projection
ideal for melodies and expressive lines
Free Stroke
softer and more intimate
perfect for arpeggios and accompaniment
requires careful fingertip control to maintain clarity
The key is to let the fingertip glide, not grab.
Left‑Hand Coordination Becomes Even More Important
Because the right hand produces a softer attack, the left hand must be:
clean
precise
well‑timed
relaxed
Buzzes and unclear shifts become more noticeable without the crispness of nails. This is actually a gift—it forces your technique to become more refined.
Repertoire That Shines Without Nails
Some music sounds especially beautiful without nails:
Renaissance lute pieces
Baroque dances
Romantic miniatures
lyrical études
intimate modern works
Pieces that rely on warmth, legato, and vocal phrasing come alive in this sound world.
How to Practice Without Nails
1. Start With Open‑String Patterns
Focus on clarity, evenness, and tone.
2. Play Slow Scales
Listen for consistency from finger to finger.
3. Record Yourself
You’ll hear the subtle differences more clearly.
4. Explore Tone Colors
Even without nails, you still have a palette—bridge, soundhole, angle, pressure.
5. Don’t Compare—Explore
It’s not about matching your “nail tone.” It’s about discovering a new one.
A Final Thought: Nails Are a Choice, Not a Requirement
Playing without nails is not a lesser version of classical guitar—it’s simply a different aesthetic. Many great players throughout history have chosen it intentionally. It offers warmth, intimacy, and a direct connection between your hand and the string that can feel profoundly musical.
One fingertip at a time. One phrase at a time. One new sound at a time. That’s how playing without nails becomes artistry.
Let’s build your technique, confidence, and artistry together—visit drjclassicalguitar.com
Rubato and Timing on Classical Guitar (Bending Time Without Breaking the Line)
Why Rubato Matters
Rubato is one of the most beautiful expressive tools we have as classical guitarists. It’s the art of stretching and compressing time—subtly, tastefully, musically—to let a phrase breathe. Unlike strict metronomic playing, rubato invites emotion into the timing. It’s the difference between reciting words and speaking them with meaning.
But rubato is also one of the most misunderstood concepts. Too much, and the music feels unstable. Too little, and the line feels rigid. The goal is not to abandon the pulse—it’s to shape it with intention.
The Guitar’s Unique Relationship With Time
Unlike piano or violin, the guitar’s sound decays quickly. This means:
timing must support the natural fade of the note
rubato must be subtle to avoid breaking continuity
phrasing relies heavily on timing choices
Because our scores rarely include detailed phrasing marks, rubato becomes one of the primary ways we create expressive shape. We’re not just playing in time—we’re sculpting time.
Rubato Is Not Random
True rubato is never guesswork. It’s guided by:
harmonic tension and release
melodic direction
phrase structure
emotional character
stylistic context
Rubato is a conversation between the written score and your interpretive voice. It’s freedom with purpose.
Two Types of Rubato Every Guitarist Should Know
1. Melodic Rubato
The melody stretches or compresses slightly while the underlying pulse remains implied. This is common in Romantic repertoire and lyrical passages.
2. Structural Rubato
The entire musical fabric breathes—slowing into cadences, relaxing after climaxes, leaning forward into transitions. This is broader and more architectural.
Both types are essential, and both must be used with taste.
How to Use Rubato Musically
1. Lean Into Tension
When harmony intensifies or the melody climbs, a slight push forward can heighten the emotion.
2. Relax Into Resolution
When the phrase resolves, allow a gentle release of time. This mirrors the natural exhale of the music.
3. Shape the Phrase Like Speech
Imagine reading a sentence aloud. You naturally:
pause
emphasize
stretch
relax
Rubato follows the same logic.
4. Keep the Underlying Pulse Alive
Even when the timing bends, the listener should feel the heartbeat of the music. Rubato is elastic, not chaotic.
Timing as a Technical Tool
Rubato isn’t only expressive—it’s also practical. Good timing helps:
smooth difficult shifts
hide technical transitions
support legato
clarify polyphony
stabilize right‑hand patterns
When timing is intentional, technique feels more fluid.
How to Practice Rubato and Timing
1. Start With Strict Time
Before bending the phrase, play it with a metronome. This gives you a baseline. You can’t bend time until you know what “straight” feels like.
2. Sing the Phrase
Singing reveals natural timing. Where you breathe, you’ll likely use rubato.
3. Exaggerate, Then Refine
Over‑shape the timing at first. Then dial it back until it feels organic.
4. Record Yourself
Rubato is easier to judge from the outside. Recording helps you hear whether the timing flows or feels forced.
5. Practice With a “Breathing Pulse”
Instead of a rigid beat, imagine the pulse expanding and contracting gently—like a living organism.
Rubato Across Styles
Rubato is not universal. It must respect the style:
Baroque → minimal rubato, more rhythmic clarity
Classical → subtle, phrase‑based rubato
Romantic → expressive, melodic rubato
Modern → depends on the composer’s language
Understanding the style keeps your timing choices authentic.
A Final Thought: Time Is Your Canvas
Rubato and timing are where interpretation becomes deeply personal. You’re not just playing notes—you’re shaping the emotional arc of the music. You’re deciding where the line breathes, where it leans, where it hesitates, and where it moves forward with purpose.
One phrase at a time. One breath at a time. One moment of timing at a time. That’s how rubato becomes artistry.
If this resonated with you, imagine what we can do in a lesson. drjclassicalguitar.com
Expressive Phrasing on Classical Guitar (Finding the Music between the Notes)
Why Phrasing Is the Heart of Musical Expression
Phrasing is where technique becomes storytelling. It’s how we shape musical sentences, breathe through lines, and give direction to even the simplest melody. On piano, phrasing is often clearly marked—slurs, arches, dynamic curves, and articulations guide the performer’s interpretation. But on classical guitar, the score is usually sparse. We’re given notes, rhythms, and fingerings… and then we’re expected to imagine the rest.
This isn’t a limitation—it’s an invitation. Guitarists must become their own editors, shaping phrases with intention rather than relying on printed instructions.
Why Guitar Scores Often Lack Phrasing Marks
Unlike piano scores, guitar notation has a long tradition of minimalism. There are several reasons:
Historical editions were handwritten, and adding detailed phrasing was labor‑intensive.
Guitar technique varies widely, so editors avoided prescribing phrasing that might conflict with a player’s approach.
The instrument’s sustain is short, so phrasing must be created through tone, timing, and articulation—not just slurs.
Many early guitar composers assumed performers already understood stylistic phrasing, especially in Baroque and Classical repertoire.
The result is a landscape where the notes are given, but the music is up to you.
Becoming Your Own Phrasing Guide
Since the score won’t tell you how to shape the line, you must learn to read between the notes. Start by asking:
Where does the phrase begin and end
Which notes feel like “arrival points”
Where does the harmony change
Which notes lead forward, and which ones relax
What is the emotional character of the line
These questions help you build a natural, expressive arc—your own musical sentence structure.
Breathing Through the Line
Even though we don’t physically breathe into the instrument, phrasing on guitar is deeply connected to breath. Try:
inhaling before a phrase begins
exhaling into the arrival note
letting the breath guide your rubato
shaping crescendos and diminuendos with breath in mind
This creates a sense of organic flow that feels vocal and alive.
Using Tone, Color, and Articulation to Shape Phrases
Because the guitar doesn’t sustain like a piano or violin, phrasing relies heavily on right‑hand choices:
Tone Color
warm tone for lyrical openings
brighter tone for climaxes
subtle shifts for emotional shading
Articulation
rest stroke for emphasis
free stroke for transparency
legato connections through careful left‑hand coordination
Dynamics
gentle crescendos into tension
soft releases into cadences
dynamic shaping that mirrors speech patterns
These tools allow you to “draw” the phrase even when the score is silent about how it should sound.
Left‑Hand Connection: The Illusion of Legato
True legato is challenging on guitar, but you can create the illusion of it by:
minimizing finger lift
coordinating shifts with the musical line
using guide fingers to smooth transitions
releasing pressure only when necessary
This helps the phrase feel continuous, even when the instrument naturally decays.
How to Practice Expressive Phrasing
1. Sing the Line First
If you can sing it, you can phrase it. Singing reveals natural breaths, peaks, and resolutions.
2. Play the Phrase With No Dynamics
Focus only on connection and direction. Once the shape is clear, add color.
3. Exaggerate the Phrasing
Over‑shape the line at first. Then refine it until it feels natural.
4. Record Yourself
You’ll hear whether the phrase flows or feels flat. Recording is the most honest teacher.
5. Mark Your Own Phrasing
Don’t be afraid to write in:
slurs
arrows
breath marks
dynamic curves
tone color reminders
You’re not altering the score—you’re clarifying your interpretation.
A Final Thought: Phrasing Is Personal
Because guitar scores rarely tell you how to shape the music, expressive phrasing becomes a deeply personal craft. You’re not just playing notes—you’re giving them life. You’re choosing where the line breathes, where it leans, where it whispers, and where it sings.
One phrase at a time. One breath at a time. One expressive decision at a time. That’s how interpretation becomes artistry.
If you’re inspired to go deeper, come learn with me at drjclassicalguitar.com
Right‑Hand Tone Colors (Painting With Sound on Classical Guitar)
Why Tone Color Matters
One of the most magical aspects of the classical guitar is its ability to change color with the slightest shift of the right hand. Unlike many instruments where tone is fixed, the guitar responds instantly to touch, angle, and placement. Tone color isn’t just an effect—it’s a language. It shapes emotion, highlights phrasing, and brings depth to even the simplest line.
Learning to control tone color is like learning to paint. The more colors you can create, the more expressive your playing becomes.
The Sound Palette: From Warm to Bright
Your right hand can produce a wide spectrum of colors. The two primary axes are:
1. Soundhole vs. Bridge
Near the soundhole (sul tasto) Warm, round, flute‑like, intimate
Near the bridge (sul ponticello) Bright, focused, metallic, intense
This is your biggest color shift. Even a small movement of a few centimeters creates a dramatic change.
2. Nail Angle and Contact
Flatter angle → warmer, blended tone
More vertical angle → brighter, more articulate tone
More flesh → softer, breathier sound
More nail → clearer, projecting sound
These micro‑adjustments give you fine control over shading and nuance.
Using the Fingers as Brushes
Each finger naturally produces a slightly different color:
i tends to be warm and round
m often produces a brighter, more focused sound
a can be brilliant and expressive
p has its own palette depending on angle and depth
Rather than fighting these differences, embrace them. Use them intentionally to shape lines and textures.
Rest Stroke vs. Free Stroke: Built‑In Color Choices
Rest stroke naturally produces:
a darker, fuller, more singing tone
more projection
more weight in the phrase
Free stroke naturally produces:
a lighter, clearer, more transparent tone
more agility
more subtlety
Switching between the two is one of the easiest ways to shift color mid‑phrase.
Hand Position: The Architecture of Color
Tone color is deeply influenced by the overall shape of your hand:
Higher wrist → brighter, more nail‑driven sound
Lower wrist → warmer, flesh‑supported sound
Hand closer to the strings → more control and intimacy
Hand farther away → more brilliance and attack
These aren’t “correct” or “incorrect” positions—they’re expressive choices.
How to Practice Tone Colors
1. Single‑String Color Exploration
Choose one string and play a slow scale or simple melody. Move gradually:
from soundhole to bridge
from flesh‑heavy to nail‑heavy
from flat angle to vertical angle
Listen for the subtle shifts. This builds awareness and control.
2. Color Mapping a Phrase
Take a short phrase from a piece and play it:
entirely sul tasto
entirely sul ponticello
with rest stroke
with free stroke
with mixed angles
Then choose the version that best expresses the musical idea.
3. Dynamic + Color Combinations
Experiment with:
soft + bright
soft + warm
loud + warm
loud + bright
These combinations create expressive contrasts that bring phrases to life.
4. Record Yourself
Tone color is easier to judge from the outside. Recording reveals:
subtle inconsistencies
unexpected brightness
uneven finger tone
color shifts you didn’t realize you were making
This feedback is invaluable.
Using Tone Color Musically
Tone color isn’t just a technical exercise—it’s storytelling. Use it to:
highlight a melody
separate voices in polyphony
create tension and release
shape phrases
bring contrast to repeated sections
evoke mood (mysterious, tender, bold, distant)
The more intentional your color choices, the more expressive your playing becomes.
A Final Thought: Tone Color Is Personal
Every guitarist has a unique tone color palette. It’s shaped by your nails, your hands, your technique, your taste, and your musical imagination. There’s no single “correct” sound—only the sound that feels true to you.
One color at a time. One phrase at a time. One moment of listening at a time. That’s how tone becomes artistry.
Bring your musical voice to life—start lessons today at drjclassicalguitar.com
Rest Stroke vs. Free Stroke (Finding the Right Touch for Every Musical Moment)
Why These Two Strokes Matter
Rest stroke and free stroke are the foundational articulations of classical guitar technique. They shape tone, phrasing, projection, and even the emotional character of a piece. Understanding when—and why—to use each stroke gives you expressive control that goes far beyond simple mechanics. These strokes aren’t opposites; they’re complementary tools that help you speak more clearly through the instrument.
Rest Stroke: Power, Warmth, and Direction
The rest stroke (apoyando) is all about depth and intention. After playing the string, the finger comes to rest on the adjacent string, creating a fuller, more projecting sound.
What It Feels Like
the finger moves through the string with a confident follow‑through
the tone is warm, round, and strong
the hand feels grounded and stable
the movement is slightly larger and more deliberate
When to Use It
bringing out a melody
emphasizing a musical line
creating a singing, vocal quality
projecting in larger spaces
shaping lyrical passages that need weight
Rest stroke is like speaking with a richer, more resonant voice. It gives the music presence.
Free Stroke: Clarity, Lightness, and Flexibility
The free stroke (tirando) is the everyday voice of the classical guitar. After playing the string, the finger moves freely into the air without touching the next string.
What It Feels Like
the finger releases the string with minimal movement
the tone is clear, articulate, and controlled
the hand stays relaxed and mobile
the motion is efficient and economical
When to Use It
arpeggios
accompaniment patterns
fast scale passages
contrapuntal textures
moments requiring delicacy or transparency
Free stroke is like speaking with clarity and nuance. It allows for agility and subtlety.
Tone Differences: Two Colors, One Palette
Think of rest stroke and free stroke as two colors on your expressive palette:
Rest stroke → darker, richer, more projecting
Free stroke → lighter, clearer, more transparent
Neither is “better.” The artistry lies in choosing the right color for the musical moment.
How to Practice Rest Stroke
Start slowly and focus on:
a smooth, confident follow‑through
relaxed knuckles and a natural finger arc
consistent tone from finger to finger
letting the finger land on the next string without force
Practice single notes, then simple melodic lines. Listen for warmth and evenness.
How to Practice Free Stroke
Begin with:
small, efficient movements
relaxed fingertips
even tone across strings
stable hand position without collapsing the wrist
Practice arpeggios, open‑string patterns, and short scale fragments. Aim for clarity and control.
Combining the Two: Real Musicality
The real magic happens when you blend both strokes within a piece. For example:
melody in rest stroke
accompaniment in free stroke
bass notes in rest stroke for weight
inner voices in free stroke for transparency
This creates a layered, orchestral texture—one of the hallmarks of expressive classical guitar playing.
A Final Thought: Let the Music Decide
Rest stroke and free stroke aren’t rules—they’re choices. Let the music guide you. Ask:
What voice needs to sing
What line needs clarity
What moment needs weight
What texture needs transparency
When you listen deeply and choose intentionally, your right hand becomes a storyteller.
One stroke at a time. One phrase at a time. One expressive decision at a time. That’s how technique becomes artistry.
If this resonated with you, imagine what we can do in a lesson. drjclassicalguitar.com
Nail Care for Classical Guitarists (Shaping Your Sound at the Source)
Why Nail Care Matters
For classical guitarists, nails aren’t cosmetic—they’re part of the instrument. They shape the attack, color, clarity, and projection of every note you play. Good nail care isn’t about achieving a “perfect” shape; it’s about finding the shape that supports your tone, your technique, and your musical voice. With a little consistency and curiosity, nail care becomes a simple, satisfying ritual that elevates your sound every day.
Start With Healthy Nails
Beautiful tone begins with healthy nails. Before shaping or polishing, make sure your nails are:
hydrated (not brittle or peeling)
free of cracks or splits
trimmed to a manageable length
filed smoothly without jagged edges
A few simple habits go a long way:
moisturize your hands regularly
avoid using nails as tools
keep nails clean and dry
wear gloves when doing rough work
Healthy nails respond better to shaping and produce a more consistent tone.
Finding Your Ideal Nail Length
There’s no universal “correct” length—only what works for your hand, your technique, and your tone goals. A good starting point:
the nail should extend just slightly beyond the fingertip
you should feel the flesh and the nail contact the string
the nail should guide the sound, not dominate it
If the nail is too long, the tone becomes thin or clicky. Too short, and you lose clarity and projection. Aim for a length that feels natural and produces a warm, centered sound.
Shaping the Nail: Your Personal Tone Curve
Nail shape is where tone becomes personal. Most classical guitarists use a ramped shape, where one side of the nail is slightly longer than the other. This creates a smooth release and a rich, blended tone.
A few shaping principles:
The ramp: usually slopes from left to right for right‑hand players
The edge: should be smooth, never sharp
The curve: should follow the natural contour of your fingertip
The underside: should be polished to reduce noise
Experiment slowly. Shape a little, play a little. Let your ear guide your file.
Polishing: The Secret to a Clean, Noise‑Free Attack
Even a beautifully shaped nail can sound scratchy if the surface is rough. Polishing creates a glass‑smooth edge that glides off the string.
Use:
a fine file (400–600 grit)
a micro‑mesh buffer (2400–12000 grit)
gentle, consistent strokes
Polish the underside and the edge until the nail feels silky. This small step dramatically improves clarity and reduces unwanted noise.
Understanding Tone Colors Through Nail Angle
Your nail angle is a powerful tone‑shaping tool. Small changes create big differences:
Flatter angle → warmer, rounder sound
More vertical angle → brighter, more focused sound
More fingertip contact → softer, more intimate tone
More nail contact → clearer, more projecting tone
Experiment with these angles during slow practice. You’ll discover a palette of colors you can use in real music.
Maintenance: Keeping Your Nails Performance‑Ready
Nails change daily—length, moisture, shape, even flexibility. Build a simple maintenance routine:
check your nails before each practice
file lightly every day or two
polish as needed
keep a small file in your case
avoid sudden length changes
Consistency is key. Small, frequent adjustments keep your tone stable and predictable.
What to Do When a Nail Breaks
It happens to everyone. When it does:
smooth the break immediately
reshape the nail to match the others
adjust your technique temporarily
consider a temporary reinforcement (silk wrap, ping‑pong ball, or nail glue)
A broken nail isn’t a crisis—it’s just a chance to practice adaptability.
A Final Thought: Nail Care Is Part of Your Artistry
Nail care isn’t vanity. It’s craftsmanship. It’s the quiet, daily work that supports your sound, your confidence, and your musical expression. Over time, your nails become part of your identity as a guitarist—your personal signature on every note.
One file stroke at a time. One small adjustment at a time. One moment of listening at a time. That’s how nail care becomes artistry.
Your guitar has more to say. Let’s explore it together at drjclassicalguitar.com
Tone Production on Classical Guitar (Shaping Sound with Intention)
Why Tone Is the Heart of Classical Guitar
Tone is the soul of classical guitar playing. It’s the first thing listeners notice and the last thing they forget. Long before speed, repertoire, or advanced techniques, tone is what makes the instrument feel alive in your hands. And the beautiful truth is this: tone isn’t a mystery reserved for virtuosos. It’s a craft—one you can shape, refine, and personalize every single day.
Tone production is not about force. It’s about awareness, balance, and the quiet decisions your hands make moment by moment.
Start With the Contact Point
Every sound begins where nail meets string. Before playing a single note, take a moment to observe:
the angle of your fingertip
the length and shape of your nail
the point of contact on the string
the direction of your stroke
Small adjustments here create huge changes in color. A slightly flatter nail angle warms the sound; a more vertical angle brightens it. Moving closer to the bridge adds brilliance; moving toward the soundhole adds roundness. Treat these as colors on a palette, not “right” or “wrong” choices.
Let the Finger Follow Through
A beautiful tone comes from a relaxed, confident follow‑through. Instead of plucking at the string, think of playing through it. The finger should travel in a smooth, natural arc—not snapping, not grabbing, not collapsing. When the movement is fluid, the sound becomes fuller and more resonant.
Imagine drawing a bow across a violin string. That same sense of continuity applies here.
Nail Shape: Your Built‑In Equalizer
Nail shape is deeply personal, but a few principles help guide the process:
a smooth ramp creates a warm, blended tone
a sharper edge adds clarity and projection
a polished surface reduces noise
consistency across fingers creates evenness
Experiment slowly. File a little, play a little. Your nails are part of your instrument, and shaping them is part of shaping your voice.
Right‑Hand Position: Stability Without Rigidity
Tone suffers when the hand is tense or collapsed. Aim for:
a gently arched wrist
relaxed knuckles
fingers that move independently
a thumb that floats without pressing
Think of your hand as a suspension bridge—stable, but flexible. This balance allows the fingers to produce a rich, controlled sound without strain.
Left Hand Matters Too
Tone isn’t only a right‑hand issue. The left hand contributes more than we often realize:
clean, precise finger placement
minimal pressure (just enough to avoid buzzing)
smooth shifts that don’t interrupt resonance
coordinated release between notes
A relaxed left hand frees the string to vibrate fully. When both hands cooperate, tone becomes effortless.
Tone Colors: Your Expressive Palette
Once your basic tone feels consistent, explore color. Try:
playing sul tasto (over the fingerboard)
playing sul ponticello (near the bridge)
alternating rest stroke and free stroke
shifting hand angle for warmth or brilliance
These colors aren’t just effects—they’re expressive tools. Use them to shape phrases, highlight melodies, or create contrast within a piece.
How to Practice Tone Production
Tone improves fastest when you practice it intentionally. Try these approaches:
1. Single‑Note Meditation
Play one note repeatedly, focusing on:
clarity
warmth
consistency
relaxation
This is simple, grounding, and incredibly effective.
2. Tone‑Focused Scales
Choose a slow tempo and listen deeply. Aim for evenness from finger to finger and string to string.
3. Color Exploration
Take a short passage and play it:
near the bridge
near the soundhole
with different nail angles
with rest stroke vs. free stroke
This builds control and expressive awareness.
4. Record Yourself
Your ear hears differently when you’re not playing. Recording reveals subtleties you might miss in the moment.
A Final Thought: Tone Is a Journey, Not a Destination
Tone production is one of the most personal aspects of classical guitar. It evolves with your technique, your taste, your repertoire, and even your mood. The goal isn’t to imitate someone else—it’s to discover the sound that feels like you.
One note at a time. One color at a time. One moment of listening at a time. That’s how tone becomes artistry.
Let’s build your technique, confidence, & artistry together visit drjclassicalguitar.com
Practicing Scales the Fun Way…
Why Scales Matter More Than We Admit
Scales are one of the most powerful tools we have as classical guitarists, yet they’re often treated like a chore—something to “get through” before the real music begins. But scales are music. They’re miniature compositions waiting to happen, full of color, phrasing, and expressive potential. When practiced creatively, scales sharpen your technique, deepen your musicality, and strengthen your connection to the instrument in ways that no étude can fully replace.
The key is to stop treating scales as mechanical drills and start treating them as musical playgrounds. With a little imagination, they become one of the most enjoyable parts of your practice.
Start With Sound: Tone, Touch, and Intention
Before worrying about speed or patterns, begin with the basics that make classical guitar so beautiful: tone and touch. Choose a scale—any scale—and play it slowly enough that you can savor each note. Listen for evenness, warmth, and clarity. Experiment with rest stroke and free stroke. Try playing near the bridge, then near the soundhole. Let your right hand explore colors the way a painter explores shades.
This transforms scale practice from “finger exercise” to “tone meditation.” It’s calming, musical, and deeply satisfying.
Add Variety With Rhythmic Play
One of the easiest ways to make scales fun is to change the rhythm. Instead of straight eighth notes, try:
dotted rhythms
triplets
syncopated patterns
long–short, short–long groupings
accents on unexpected beats
These variations challenge your coordination and keep your mind engaged. They also prepare you for real repertoire, where rhythmic flexibility is essential.
Explore Musical Shapes and Directions
Scales don’t have to be played straight up and down. Try:
three‑note patterns (1‑2‑3, 2‑3‑4, 3‑4‑5…)
four‑note patterns
interval skips (thirds, fourths, sixths)
direction changes (up two, down one)
fragmented sequences
These patterns build agility and musical awareness. They also make your fingers feel more at home on the fretboard, which pays off in sight‑reading, improvisation, and repertoire.
Turn Scales Into Mini Compositions
This is where the fun really begins. Instead of treating scales as fixed patterns, treat them as raw material for creativity. Try:
adding a simple bass line
creating a melody using only scale tones
harmonizing the scale in thirds or sixths
turning the scale into an arpeggio pattern
composing a short étude based on one scale shape
You’re not just practicing—you’re composing in real time. This builds musicianship, not just technique.
Use Notation Software to Spark Ideas
Notation software can make scale practice feel like a creative workshop. Enter a scale into the program, then experiment:
change the rhythm
add counterpoint
create variations
harmonize the scale
turn it into a short piece
Seeing the notes on the screen helps you understand patterns visually, and hearing playback gives instant feedback. It’s a playful, low‑pressure way to explore musical possibilities.
Make It Personal: Choose Keys That Feel Good
Classical guitar has its favorite keys—E minor, A minor, D major—but every guitarist has personal preferences. Some keys feel warm and resonant; others feel bright and open. Explore them all. Let the guitar show you which ones inspire you.
When you enjoy the sound, scale practice becomes something you look forward to.
End With Expression: Phrasing, Dynamics, and Color
Once the notes feel comfortable, turn your scale into a musical phrase. Add:
crescendos and diminuendos
expressive shaping
tone color changes
rubato
articulation contrasts
This is where scales stop being exercises and start becoming music. You’re training your expressive instincts, not just your fingers.
Building Speed and Accuracy the Musical Way
Speed and accuracy don’t come from forcing your fingers to move faster — they come from teaching your hands to move smarter. Start by choosing a tempo where you can play the scale with complete relaxation and evenness. Then use the “micro‑increase” method: raise the metronome by just two or three clicks at a time, only after the scale feels effortless. Focus on minimizing excess motion in both hands, keeping your fingers close to the strings, and letting gravity assist your shifts rather than fighting them. Accuracy always comes first; speed grows naturally from clean, efficient movement. When you treat speed‑building as a calm, mindful process rather than a race, you’ll be amazed at how quickly your technique blossoms.
A Joyful Habit, Not a Daily Obligation
Practicing scales the fun way isn’t about grinding through patterns—it’s about exploring sound, creativity, and expression. When you approach scales with curiosity, they become one of the most rewarding parts of your practice routine.
Start with one scale. One pattern. One musical idea. Let it grow. Let it surprise you. And most importantly—let it be fun.
Coming soon- Second Edition of my ebook on how to quicly learn to play Scales/Modes using my Traffic Light Analogy Method without resorting to charts and fretboard diagrams. Start on any note and let your fingers instantly follow the three simple patterns with three notes each based on the traffic light analogy of Yellow-Red-Green. Improvise solos in major/ionian, minor/aeolian, dorian, phrygian, lydian, mixolydian, and locrian in any key and wihtout looking at fretboard charts or notations. This is a comprehensive ebook on all things related to the seven modes of the major scale. Join my email list or subscribe to my Facebook Channel for updates on ebook availability or visit my store periodically.
Turn curiosity into real progress. Join me for lessons at drjclassicalguitar.com
How to Approach and Practice Difficult Passages
Difficult passages are where every classical guitarist earns their stripes—not through brute force or endless repetition, but through clarity, curiosity, and smart practice. These moments in the music, the ones that feel too fast, too awkward, or too complex, are not roadblocks; they’re invitations to slow down, zoom in, and understand the mechanics beneath the notes. When you learn how to approach these passages with intention rather than frustration, they transform from the “hard parts” into some of the most satisfying breakthroughs in your playing. This is where technique becomes strategy, and strategy becomes confidence.
Zoom In Before You Zoom Out
When a passage feels intimidating, isolate the exact two or three notes that cause the trouble. Don’t practice the whole line—practice the problem. Once those notes feel easy, expand outward until the entire passage flows.
Use Rhythmic Variations to Build Control
Just like with scale practice, rhythmic play is a powerful tool for difficult passages. Try:
long–short patterns
short–long patterns
dotted rhythms
bursts (fast notes inside slow tempo)
These variations strengthen coordination and help your fingers learn the passage from multiple angles.
Chunking: Turn Complexity Into Manageable Units
Break the passage into small, meaningful “chunks”—musical or technical units that make sense to your hands. Practice each chunk separately, then connect them like puzzle pieces. This prevents overwhelm and builds a sense of flow.
Practice the Passage Backwards
This is a secret weapon. Start with the last shift or the last two notes, then add the notes before them. Working backward:
reinforces the ending
builds confidence
prevents the “falling apart” effect
ensures every connection is solid
It’s one of the most efficient ways to master difficult lines.
Integrate the Music, Not Just the Mechanics
Once the passage feels technically secure, add:
dynamics
phrasing
tone color
articulation
breathing points
This transforms the passage from “something you survived” into “something you express.”
A Final Thought: Difficult Passages Reveal Your Musical Craft
The challenging spots in a piece aren’t just technical hurdles—they’re the places where your musicianship grows the fastest. Each tricky line teaches you something new about coordination, clarity, pacing, and the way your hands communicate with the instrument. When you meet these moments with curiosity instead of tension, they become opportunities to shape your playing from the inside out.
Progress doesn’t arrive all at once. It appears in small breakthroughs—one clean connection, one smoother shift, one phrase that suddenly feels natural. Over time, these tiny victories accumulate into real confidence. That’s how difficult passages become stepping‑stones toward a more expressive, more capable version of yourself.
If you’re inspired to go deeper, come learn with me at drjclassicalguitar.com.
Navigating Difficult Shifts on the Classical Guitar (and Making Them Feel Easy)
It all begins with an idea.
Why Shifts Feel Hard—and Why They Don’t Have to Be
Every classical guitarist eventually meets a shift that feels like a cliff edge: the hand jumps, the note squeaks, the timing wobbles, and suddenly the whole phrase feels unstable. But difficult shifts aren’t a sign of weak technique—they’re simply moments where the left hand needs clearer choreography. When you approach shifts with curiosity rather than tension, they become some of the most rewarding parts of your practice.
Shifts are not about speed. They’re about organization: knowing where you’re going, how you’re getting there, and which muscles can stay relaxed along the way.
Start With the Destination, Not the Departure
Most players focus on the note they’re leaving. The real secret is to focus on the note you’re arriving at. Before you even move:
visualize the target fret
feel the shape of the new chord or position
know which finger lands first
know how the hand will rotate or align
When the destination is clear, the shift becomes a smooth, confident gesture rather than a scramble.
Slow Motion: The Most Powerful Tool You Have
Slow practice isn’t punishment—it’s magnification. When you slow a shift down to a crawl, you can observe:
whether your thumb is gripping
whether your fingers lift too high
whether your wrist collapses
whether your elbow is helping or hindering
Play the shift so slowly that it feels almost silly. That’s where the real learning happens.
Guide Fingers: Your Built‑In GPS
A guide finger is any finger that stays lightly on the string during a shift. It doesn’t press—it glides. Guide fingers:
stabilize intonation
reduce tension
help you track the distance
make the shift feel predictable
Even if the score doesn’t require a guide finger, you can often invent one. A light touch on a bass string or a melodic finger can transform a scary shift into a graceful slide.
Micro‑Shifts: Break the Journey Into Pieces
If a shift feels overwhelming, divide it into tiny segments:
move just the finger
then add the hand
then add the arm
then add the timing
then add the musical phrase
This “layered” approach prevents overload and builds confidence step by step.
Relaxation: The Hidden Ingredient
Most shift problems come from tension, not distance. Before shifting:
release pressure
soften the thumb
let the hand float
allow the elbow to guide the motion
A relaxed hand moves faster, more accurately, and with far less noise.
How to Approach and Practice Difficult Passages
Zoom In Before You Zoom Out
When a passage feels intimidating, isolate the exact two or three notes that cause the trouble. Don’t practice the whole line—practice the problem. Once those notes feel easy, expand outward until the entire passage flows.
Use Rhythmic Variations to Build Control
Just like with scale practice, rhythmic play is a powerful tool for difficult passages. Try:
long–short patterns
short–long patterns
dotted rhythms
bursts (fast notes inside slow tempo)
These variations strengthen coordination and help your fingers learn the passage from multiple angles.
Chunking: Turn Complexity Into Manageable Units
Break the passage into small, meaningful “chunks”—musical or technical units that make sense to your hands. Practice each chunk separately, then connect them like puzzle pieces. This prevents overwhelm and builds a sense of flow.
Practice the Passage Backwards
This is a secret weapon. Start with the last shift or the last two notes, then add the notes before them. Working backward:
reinforces the ending
builds confidence
prevents the “falling apart” effect
ensures every connection is solid
It’s one of the most efficient ways to master difficult lines.
Integrate the Music, Not Just the Mechanics
Once the passage feels technically secure, add:
dynamics
phrasing
tone color
articulation
breathing points
This transforms the passage from “something you survived” into “something you express.”
A Final Thought: Difficult Shifts Are Opportunities
Every challenging shift is a chance to refine your technique, deepen your awareness, and strengthen your musical voice. When you approach them with patience and curiosity, they stop feeling like obstacles and start feeling like invitations.
One shift at a time. One gesture at a time. One moment of clarity at a time. That’s how mastery is built.
Composing one note at a time… If I can do it, you can absolutely do it too!
It all begins with an idea.
There’s a quiet magic in watching a piece of music take shape—one note, one idea, one tiny decision at a time. Classical guitarists often imagine composition as something reserved for the prodigies or the conservatory-trained, but the truth is far more generous. With today’s notation software and a willingness to explore, anyone can begin crafting their own musical sentences. You don’t need to start with a grand vision. You start with a style, a form, and a single note that feels honest under your fingers.
Where Your Musical Ideas Take Their First Breath
When I begin a new piece, I think of it the way a writer thinks of a paragraph. What style am I speaking in—romantic, modal, minimalist, folkloric? What form will hold the ideas—binary, ternary, theme and variations, or a simple through‑composed meditation? And what sentence structure will guide the musical flow? In music, sentences are shaped by phrases: four‑bar questions, four‑bar answers, cadences that breathe, and gestures that return like familiar thoughts. Once I choose a key—often one that resonates beautifully on the guitar, like E minor, A minor, or D major—I let the instrument suggest the next step. Open strings, natural harmonics, and idiomatic shapes become the vocabulary.
Modeling Pieces: Learning by Studying What Works
One of the most powerful (and underrated) tools in composition is modeling—using an existing piece as a structural guide while creating something entirely your own. Classical guitarists have done this for centuries. Sor modeled études after keyboard patterns, Tárrega modeled textures after Romantic piano writing, and countless modern composers model phrase shapes, cadences, and textures from the repertoire they admire. Modeling isn’t copying; it’s learning the architecture behind the music.
When I model a piece, I start by analyzing its blueprint. What is the overall form—binary, ternary, rondo, or a simple A–B shape? How long are the phrases? Where do the cadences land? What textures appear in each section—arpeggios, block chords, melodic lines with accompaniment? Once I understand the “skeleton,” I begin composing my own material inside that framework.
The beauty of modeling is that it gives you a clear path forward. Instead of staring at a blank page, you’re walking through a form that has already proven itself musically satisfying. You’re free to experiment with your own melodies, harmonies, and guitar‑friendly gestures while leaning on a structure that supports your creativity. Over time, you’ll internalize these patterns and begin inventing your own forms with confidence.
Notation software makes this especially intuitive: you can place markers, label phrases, and visually map out the structure before writing a single note.
Shaping Your Ideas with Digital Tools
Notation software becomes a powerful ally in this process. Instead of juggling ideas in your head, you can sketch freely, listen back instantly, and refine without fear of losing anything. Start by entering a simple melodic line—just a few notes that feel like a musical “sentence starter.” Then add a bass note or inner voice to give it context. The software lets you experiment with counterpoint, adjust rhythms, and test harmonic colors without the pressure of perfection. You’re not chiseling marble; you’re shaping clay.
Let Your Musical Voice Unfold
The beauty of composing for classical guitar is that the instrument rewards curiosity. A single melodic idea can blossom into a full piece once you begin exploring variations in texture, register, and harmony. And the more you work with notation software, the more you’ll discover your own patterns—your preferred cadences, your favorite intervals, your instinctive phrase lengths. Over time, these become your compositional voice.
So don’t wait for inspiration to strike like lightning. Begin with one note. One phrase. One musical sentence. If I can build pieces this way—slowly, patiently, joyfully—you can absolutely do it too. Your guitar already knows how to sing. All you’re doing is giving it a story.
Check out my original compositions here
Right‑Hand Accuracy for Classical Guitarists (Finding Precision Through Ease)
It all begins with an idea.
Why Right‑Hand Accuracy Matters More Than Speed
Right‑hand accuracy is one of the quiet superpowers of classical guitar playing. It’s the difference between clarity and muddiness, confidence and hesitation, expression and accident. When your right hand knows exactly where it’s going—string to string, stroke to stroke—your entire musical world opens up. Accuracy isn’t about drilling your hand into submission; it’s about teaching it to move with intention, efficiency, and ease.
The good news is that accuracy grows quickly when you practice it mindfully. A few small adjustments can transform your sound.
Start With Awareness: Where Is Your Hand, Really?
Most accuracy problems come from not knowing where the hand is in space. Before playing a passage, pause and notice:
the angle of your wrist
the curve of your fingers
the contact point of your nails
the distance between your hand and the strings
This moment of awareness sets the stage for precision. When your hand is organized, your fingers follow.
Planting: Your Built‑In Guidance System
Planting—touching the string lightly before playing it—is one of the most powerful tools for accuracy. It gives your fingers:
a tactile reference
a sense of stability
a predictable starting point
a calmer, more controlled attack
Use full planting for arpeggios and sequential planting for scale passages. Even a micro‑plant (a split‑second touch) can dramatically improve accuracy.
Economy of Motion: The Less You Move, the More You Control
Right‑hand accuracy improves when your fingers stay close to the strings. Excess motion creates:
timing inconsistencies
missed strings
uneven tone
unnecessary tension
Practice playing with the smallest possible movements—tiny, efficient strokes that feel almost effortless. This is where accuracy and speed begin to merge.
String Crossing: The Hidden Challenge
Many accuracy issues happen not on the notes themselves, but in the spaces between them. To master string crossing:
keep the wrist stable
let the arm assist the movement
avoid “reaching” with individual fingers
practice slow, deliberate crossings between two strings
Once the crossing feels smooth, expand to three‑string and four‑string patterns. This builds a right hand that feels grounded and confident.
Tone as a Teacher: Listen for Clarity
Your ear is your best accuracy coach. When a note is played cleanly, you’ll hear:
a clear attack
a centered tone
no accidental brushing of adjacent strings
even volume from finger to finger